Virtual network
In order to optimize resources and limit disasters within computing systems, we can successfully use virtual networks.
They are built with the help of virtual machines and at the same time serve such machines or real machines when bridges are made between the virtual machine and the real network card to which a real machine is connected.
A topology of this kind is exemplified in the image below:

The virtual network consists of a virtual router/firewall and virtual machines running different operating systems and performing specific functions. For example, a virtual machine can be created to host a web service, one that provides a database server, a machine configured as NAS, and a desktop with the ssh service activated, etc. All these virtual machines are run by the Proxmox VE virtualization environment installed on a dedicated machine.
The central element of the virtual network is the router that has multiple capabilities and can be implemented using an operating system configured for this purpose, such as pfSense or ZeroShell.
pfSense is based on the freeBSD operating system, while ZeroShell is built around a Linux kernel.
Installing ZeroShell
Attention: ZeroShell is currently abandoned but remains an exceptional tool; perhaps someone will continue the project.
I will try VyOS sometime, another Linux distribution developed to function as a router, firewall, and VPN, but here everything takes place in the console.
I was impressed from the moment I read about the capabilities of this small Linux distribution, which offers, according to what is described here , a multitude of services:
- It performs load balancing and failover for multiple Internet connections;
- Establishing UMTS / HSDPA connections via a 3G modem;
- RADIUS server to ensure authentication and automatic management of encryption keys for wireless networks 802.11b, 802.11g, and 802.11a that support the 802.1x protocol in the forms of EAP-TLS, EAP-TTLS, and PEAP; WPA with TKIP and WPA2 with CCMP are supported according to the 802.11i standard; The RADIUS server can also, based on the username, the group to which the requester belongs, or the MAC address, manage access to an allocated VLAN 802.1Q for a specific SSID;
- Captive Portal to support web connectivity on both wireless and wired networks. Zeroshell acts as a gateway for the network where the Captive Portal is active, and where IP addresses (usually belonging to private classes) are dynamically provided by DHCP. A client accessing this private network must authenticate using a web browser with a Kerberos 5 username and password before the Zeroshell firewall allows them access to the public LAN. Captive Portal gateways are often used to provide Internet access in HotSpots as an alternative to 802.1X authentication, which is too complicated for user configuration. Zeroshell natively implements Captive Portal functionality without using other software programs such as NoCat or Chillispot;
- Quality of Service (QoS) management and traffic modeling for traffic control in congested networks. Constraints can be imposed on the minimum guaranteed bandwidth, maximum bandwidth, and the priority of a packet (useful in real-time connections such as VoIP). These constraints can be applied on Ethernet interfaces, on VPNs, on PPPoE point-to-point connections, on bridges, and on the (aggregated) link of the VPN. Traffic classification can also occur through Layer 7 filters that allow Deep Packet Inspection (DPI) and, therefore, adjust the bandwidth and priority allocated to application streams such as VoIP and P2P;
- HTTP proxy with open source antivirus ClamAV capable of centrally blocking web pages that contain viruses. The proxy, created with HAVP, will operate in transparent proxy mode, which means that it is not necessary to configure users' web browsers to use the proxy server, but HTTP requests will be automatically redirected to it. It is evident that, in this case, the machine acting as a proxy must also be a gateway (IP router or bridge);
- Support for Wireless Point-to-Point functionality with Multi SSID using WiFi network cards/boards based on Atheros chipsets. In other words, a Zeroshell device with one of these Wi-Fi cards can function as an access point for IEEE 802.11 networks that support 802.1X protocols, WPA for authentication, and dynamic key generation. Clearly, authentication occurs via EAP-TLS or PEAP using the integrated RADIUS server;
- Host-to-LAN VPN with L2TP/IPsec protocol where L2TP (Layer 2 Tunneling Protocol) authenticated with Kerberos v5 username and password is encapsulated in IPsec authenticated via IKE with X.509 certificates;
- LAN-to-LAN VPN with encapsulation of Ethernet frames in SSL/TLS tunnels, supporting 802.1Q VLANs and aggregated in load balancing (increased bandwidth) or fault tolerance (increased reliability);
- Router with static and dynamic addresses (RIPv2 with MD5 or plain text authentication and Split Horizon and Poisoned Reverse algorithms);
- 802.1d bridge with Spanning Tree protocol to avoid loops even in the presence of redundant paths;
- Firewall Packet Filter and Stateful Packet Inspection (SPI), with filters applicable in both routing and connections to all types of network interfaces, including VPNs and VLANs;
- Firewall and QoS Classifier for controlling P2P file sharing traffic;
- NAT to use private class addresses on LAN, masking them on WAN with public addresses;
- TCP/UDP port forwarding (PAT) to create a Virtual Server, i.e., groups of real servers seen with a single IP address (the Virtual Server address). Requests from the virtual server will be sorted to the real servers in a Round-Robin manner, maintaining existing connections and sessions. This allows load balancing across web servers, SQL groups, and compute servers;
- Multi-zone DNS server with automatic management of Reverse Resolution in-addr.arpa;
- Multi-subnet DHCP server with the ability to assign IP addresses based on the MAC address of the requester;
- 802.1Q Virtual LAN (VLAN with tagging) applicable on Ethernet interfaces, on LAN-to-LAN VPNs, on VPN links, and on bridges formed from Ethernet links, VPNs, and VPNs;
- PPPoE client for connecting to WAN via ADSL, DSL, and cable lines (requires appropriate MODEM);
- Dynamic DNS client that allows traceability on WAN even when the IP is dynamic. Dynamic management of MX DNS records for directing SMTP email to mail servers with variable IP addresses;
- Network Time Protocol (NTP) servers and clients to keep the clocks of host devices synchronized;
- Syslog server for receiving and cataloging system logs produced by remote devices such as Unix systems, routers, switches, Wi-Fi Access Points, network printers, and other syslog-compatible devices;
- Kerberos 5 authentication through a KDC authentication and integrated cross-domain;
- LDAP, NIS, and RADIUS authorization;
- X.509 - certificate authority for the issuance and management of electronic certificates;
- Integration between Unix systems and Windows Active Directory domains into a single authentication and authorization system using LDAP and Kerberos 5 authentication across domains.
Congratulations to the author Fulvio Ricciardi and the community for the achievement.
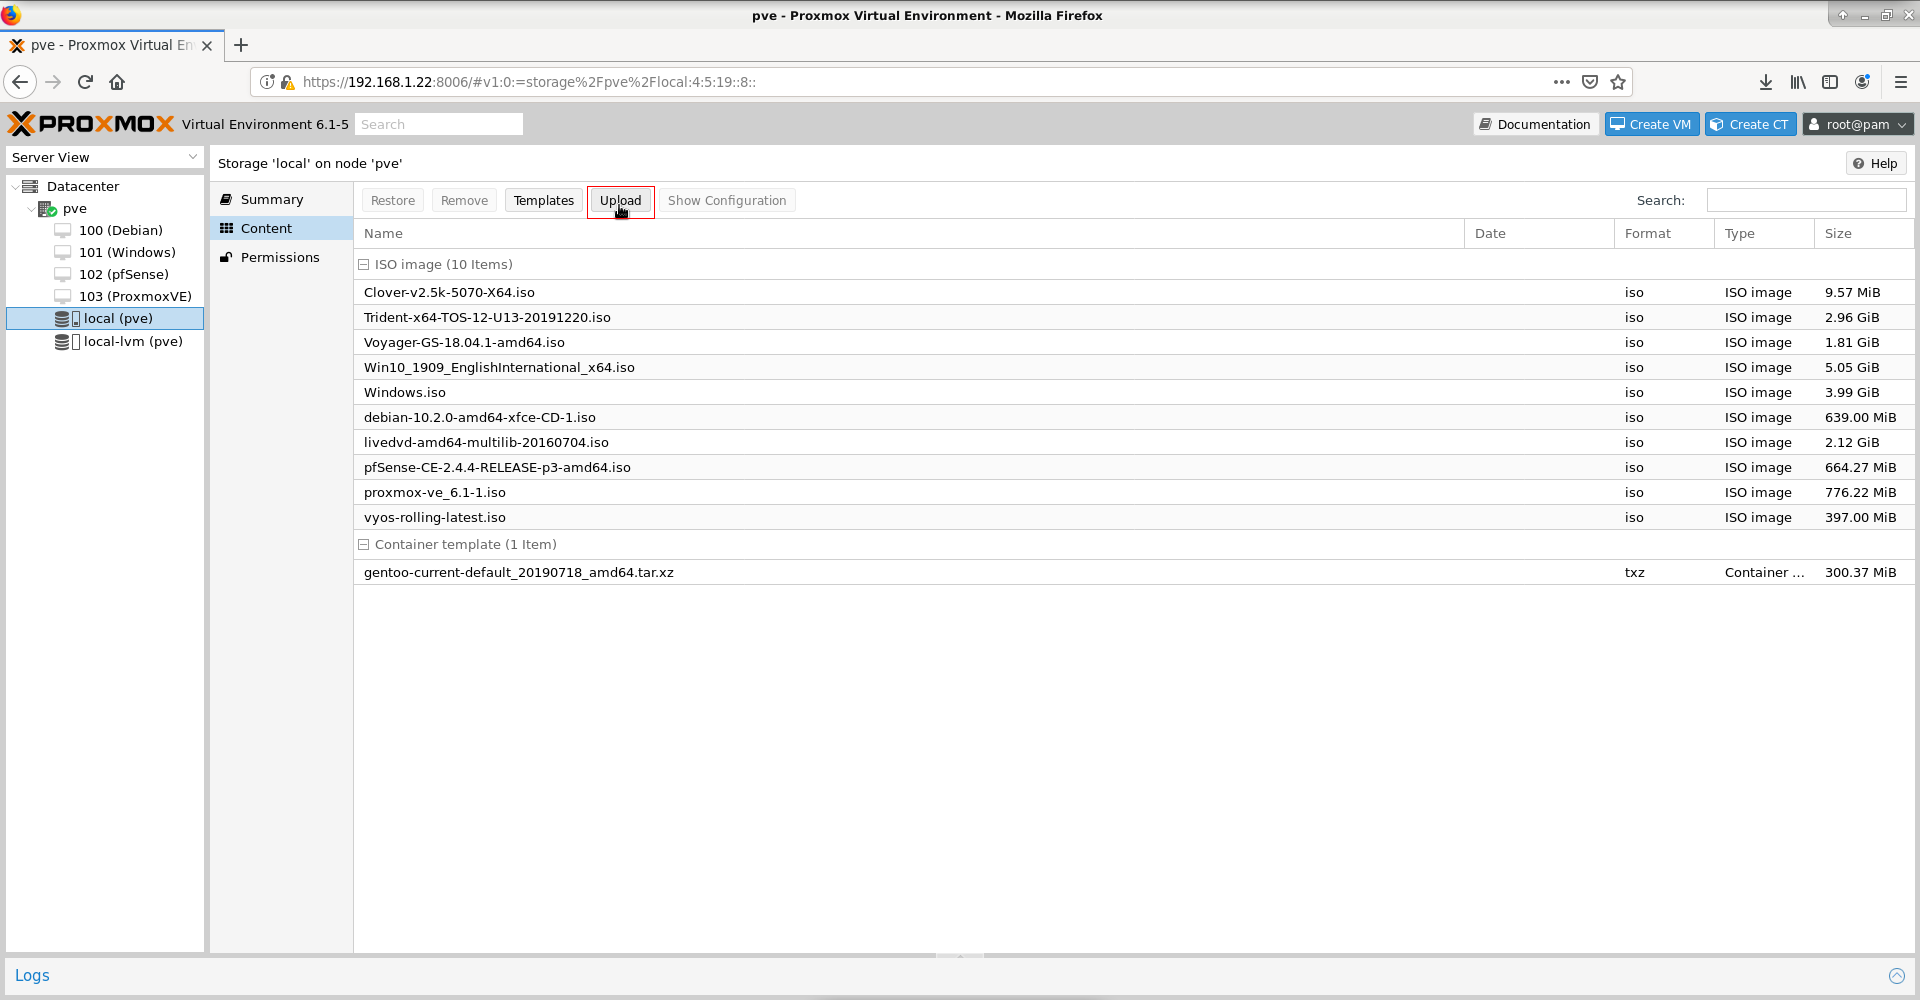
In order to install in the virtual environment, we will download the ISO image from here and upload it into the virtualization environment in the local(pve) storage space.
We press the Upload button:
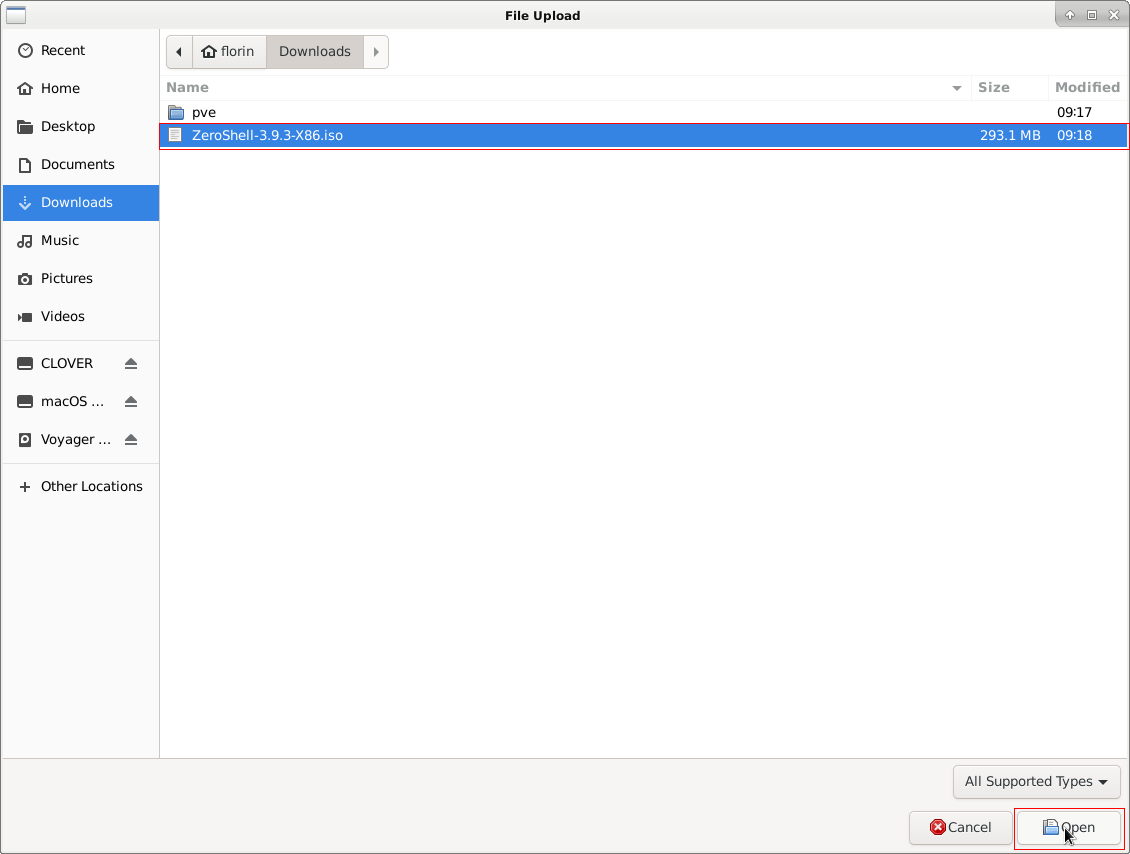
We press the Select file button:

We are looking for the location where the ISO image is located:
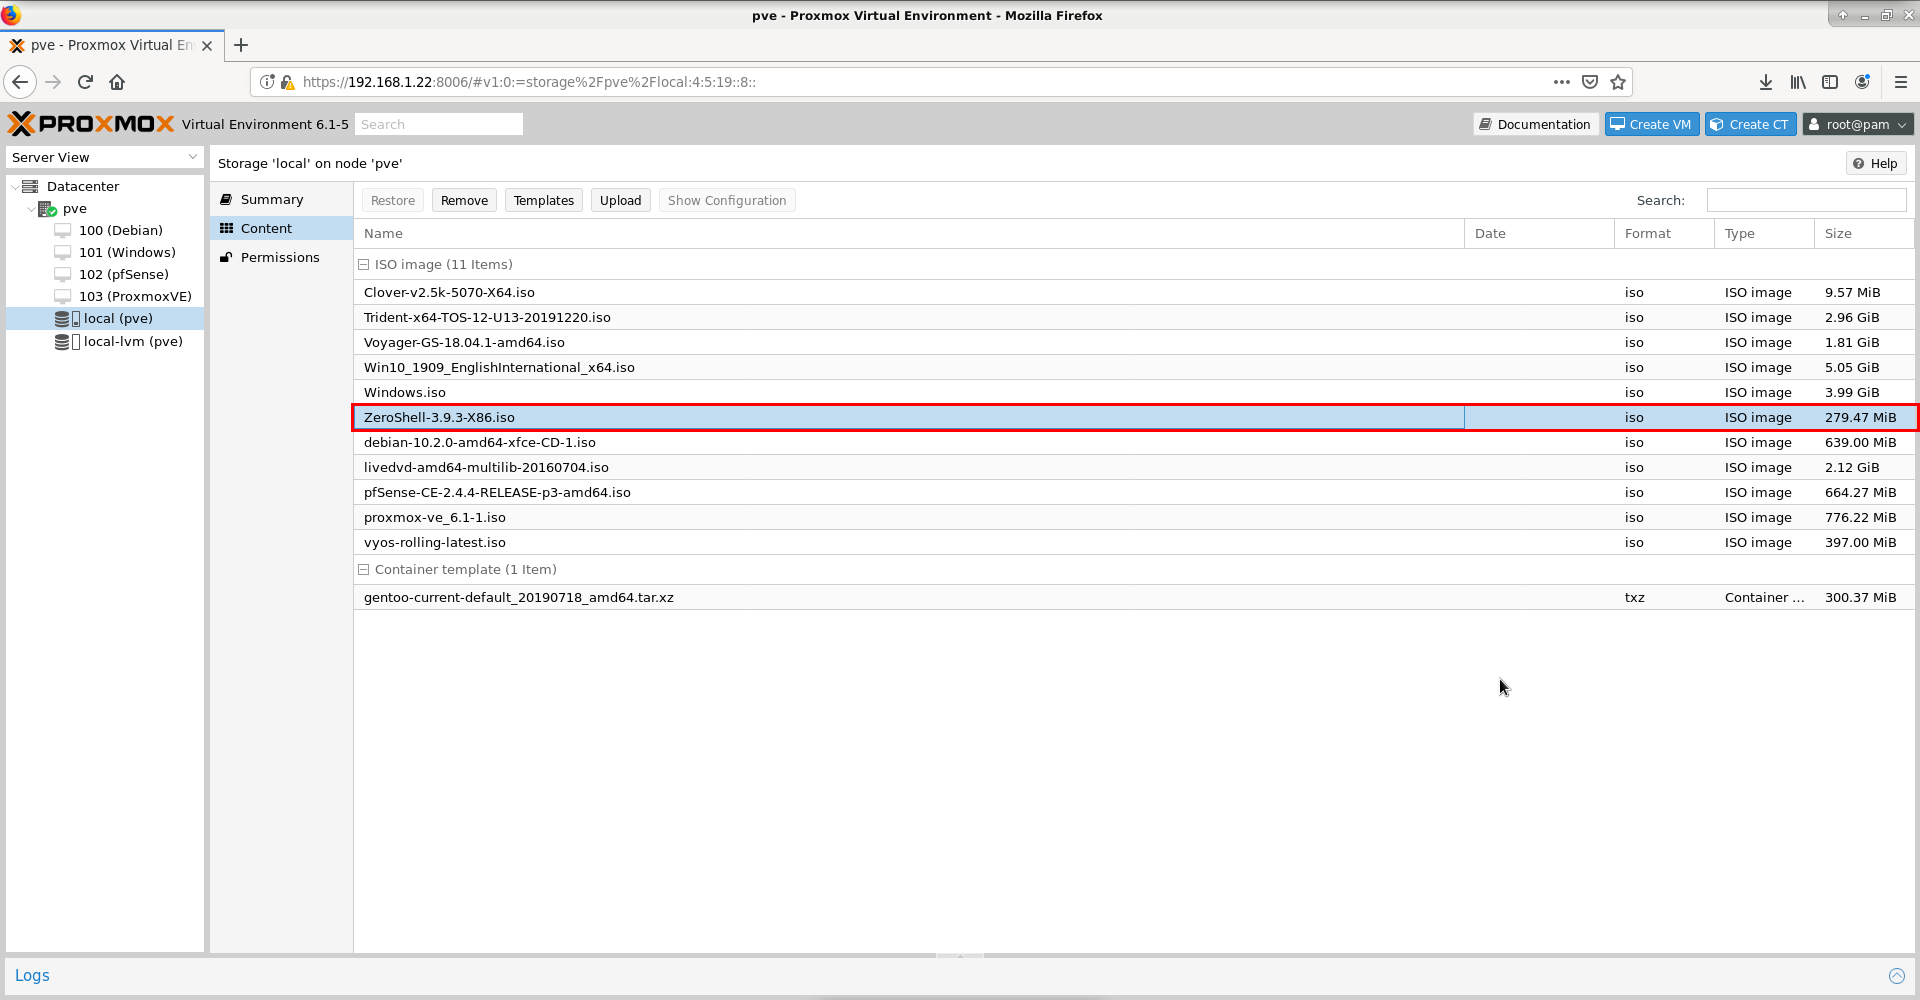
After uploading to the storage environment, the image will appear in the list of ISO images:
Create network interface
Since a router/firewall needs two network interfaces, one WAN connected to the external network (internet) and one LAN connected to the internal network, we will need to create another network interface of the bridge type, which we will assign to the LAN network. Automatically, Proxmox created a bridge vmbr0 to the only internal network card I currently have at the time of installation, through which the Proxmox server is connected to the Asus router in the network.
In this sense, we select the pve node in the left window, then select System -> Network in the right window and click the Create button, after which we choose the Linux Bridge option, as shown in the image below:

A new bridge will be created, named vmbr1 in this case, to which we will not assign anything (IP, physical interface, etc.). Our interface will look like the image below:

This will later be assigned to the router/firewall (virtual machine) as a LAN network interface.
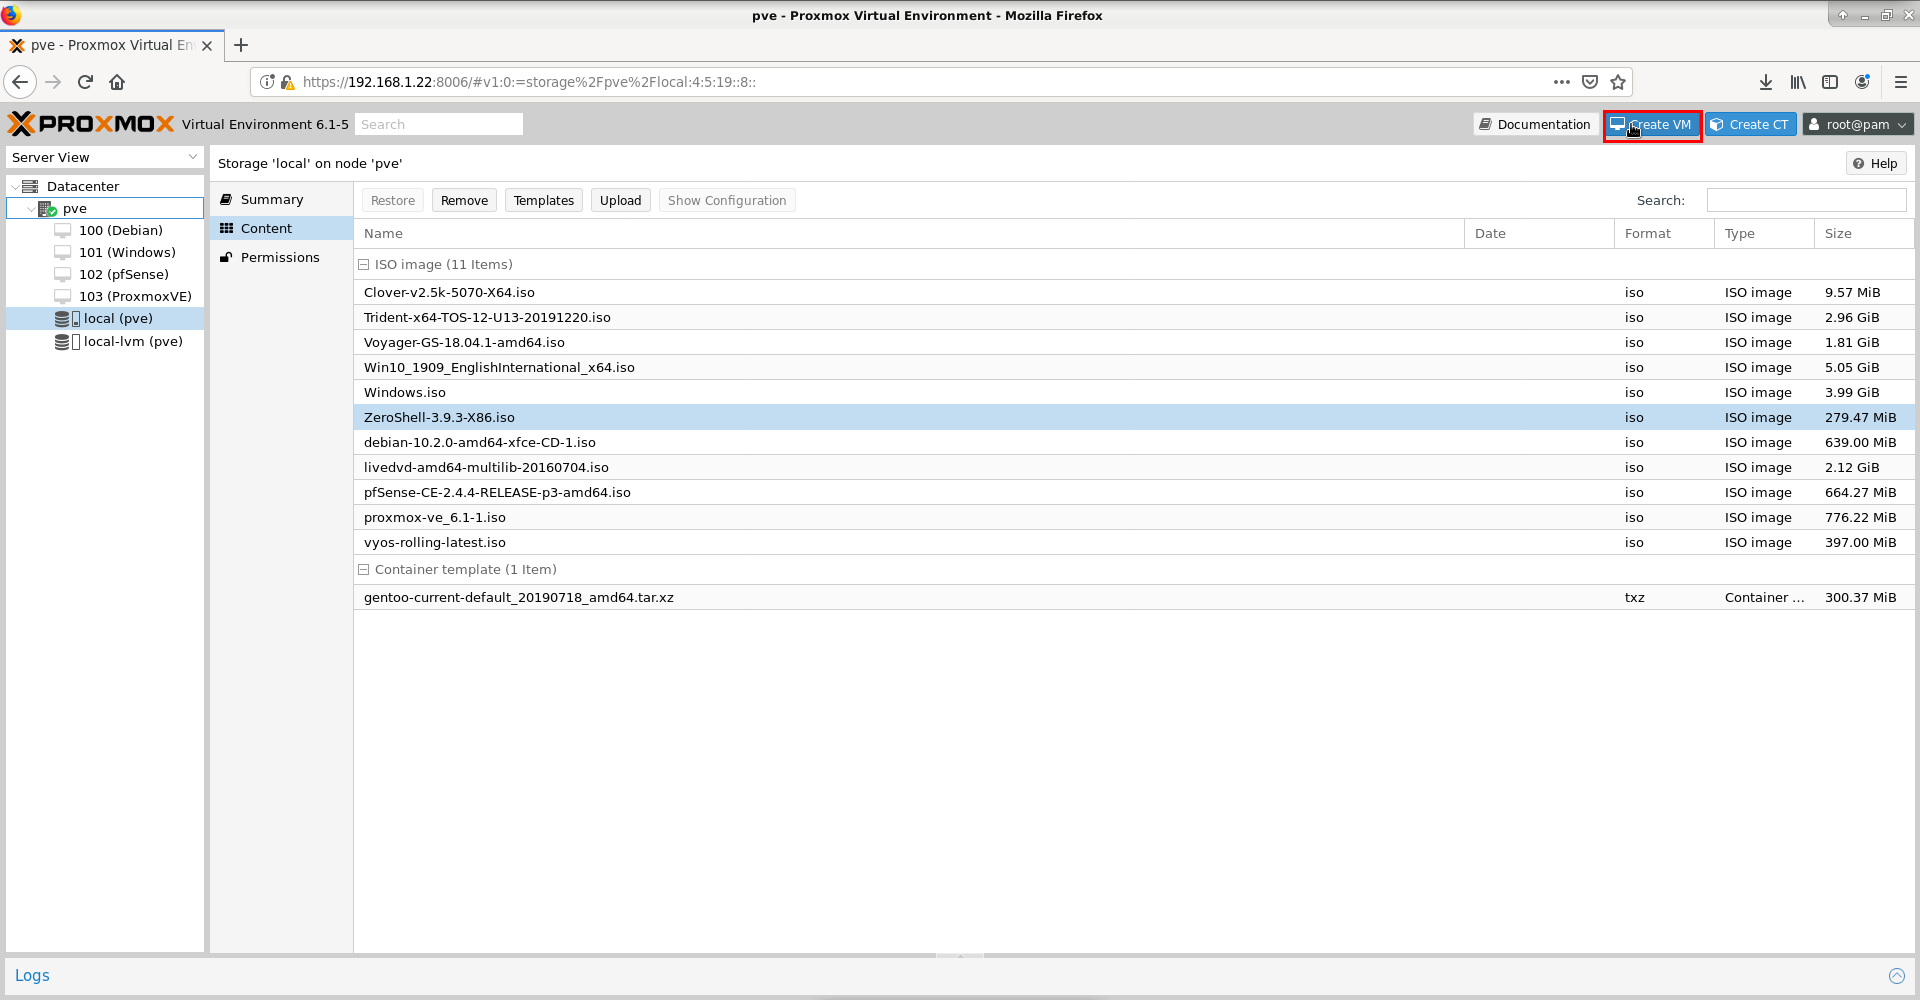
Create virtual machine
Next, we will create a virtual machine. To do this, it is necessary to press the Create VM button:
After that, a window will open in which we will assign different characteristics to our virtual machine. To begin with, we will name our machine, for example ZeroShell, and we press the Next button to move to the next tab:

We choose from the location where the ISO images are stored the image with the operating system that will be installed, in this case the file ZeroShell-3.9.3-x86.iso:
.png)
After selecting the iso image for the Guest OS, we do not make any changes, leaving the default selections for Type: Linux and Version: 5.x - 2.6 Kernel, which is what interests us.
The window will look like the one below, and we will press the Next button to proceed to the next tab:
.png)
In the System tab, we left the default selections, Graphic card: Default and SCSI Controller: VirtIO SCSI, as shown in the image below, after which we will press the Next button to advance to the next tab:
.png)
In the corresponding Hard Disk tab, we will define the characteristics of the virtual hard disk used by our virtual machine. I chose to create a 5 GB image (which is more than sufficient for ZeroShell, as the documentation states it can manage with 0.5GB - here I exaggerated, but I think I might use it for other services as well) after which I selected, out of habit, Discard; this option is only used by systems with a kernel starting from version 5.x. But who knows, maybe we will receive a kernel upgrade for ZeroShell. After completing the modifications, we will press the Next button to proceed to the next tab:
.png)
In this tab Memory, we will define the amount of memory allocated to our virtual machine from the physical memory. In this case, I chose 1024 MB, being generous with the technical specifications of the virtual machine once again. I will probably reduce it to 512 MB in the future. After defining the amount of memory, we will press the Next button to move to the next tab:
.png)
In the Network tab, we will choose a network interface. In this case, I chose the interface used for WAN, namely the bridge vmbr0 to the physical network card, and the selected model was Model: VirtIO (paravitualized), after which we press the Next button to proceed to the next window:
.png)
In the Confirm tab, we will have a summary of our previous options, and if we agree with them, we will press the Finish button to create the virtual machine, in this case 104(ZeroShell):
.png)
We will need to add the previously created network interface vmbr1 to our virtual machine that will be used for LAN. For this purpose, we select our machine in the left window, in this case 104(ZeroShell), and in the right window, we will choose Hardware -> Add -> Network Device as shown in the following screen:
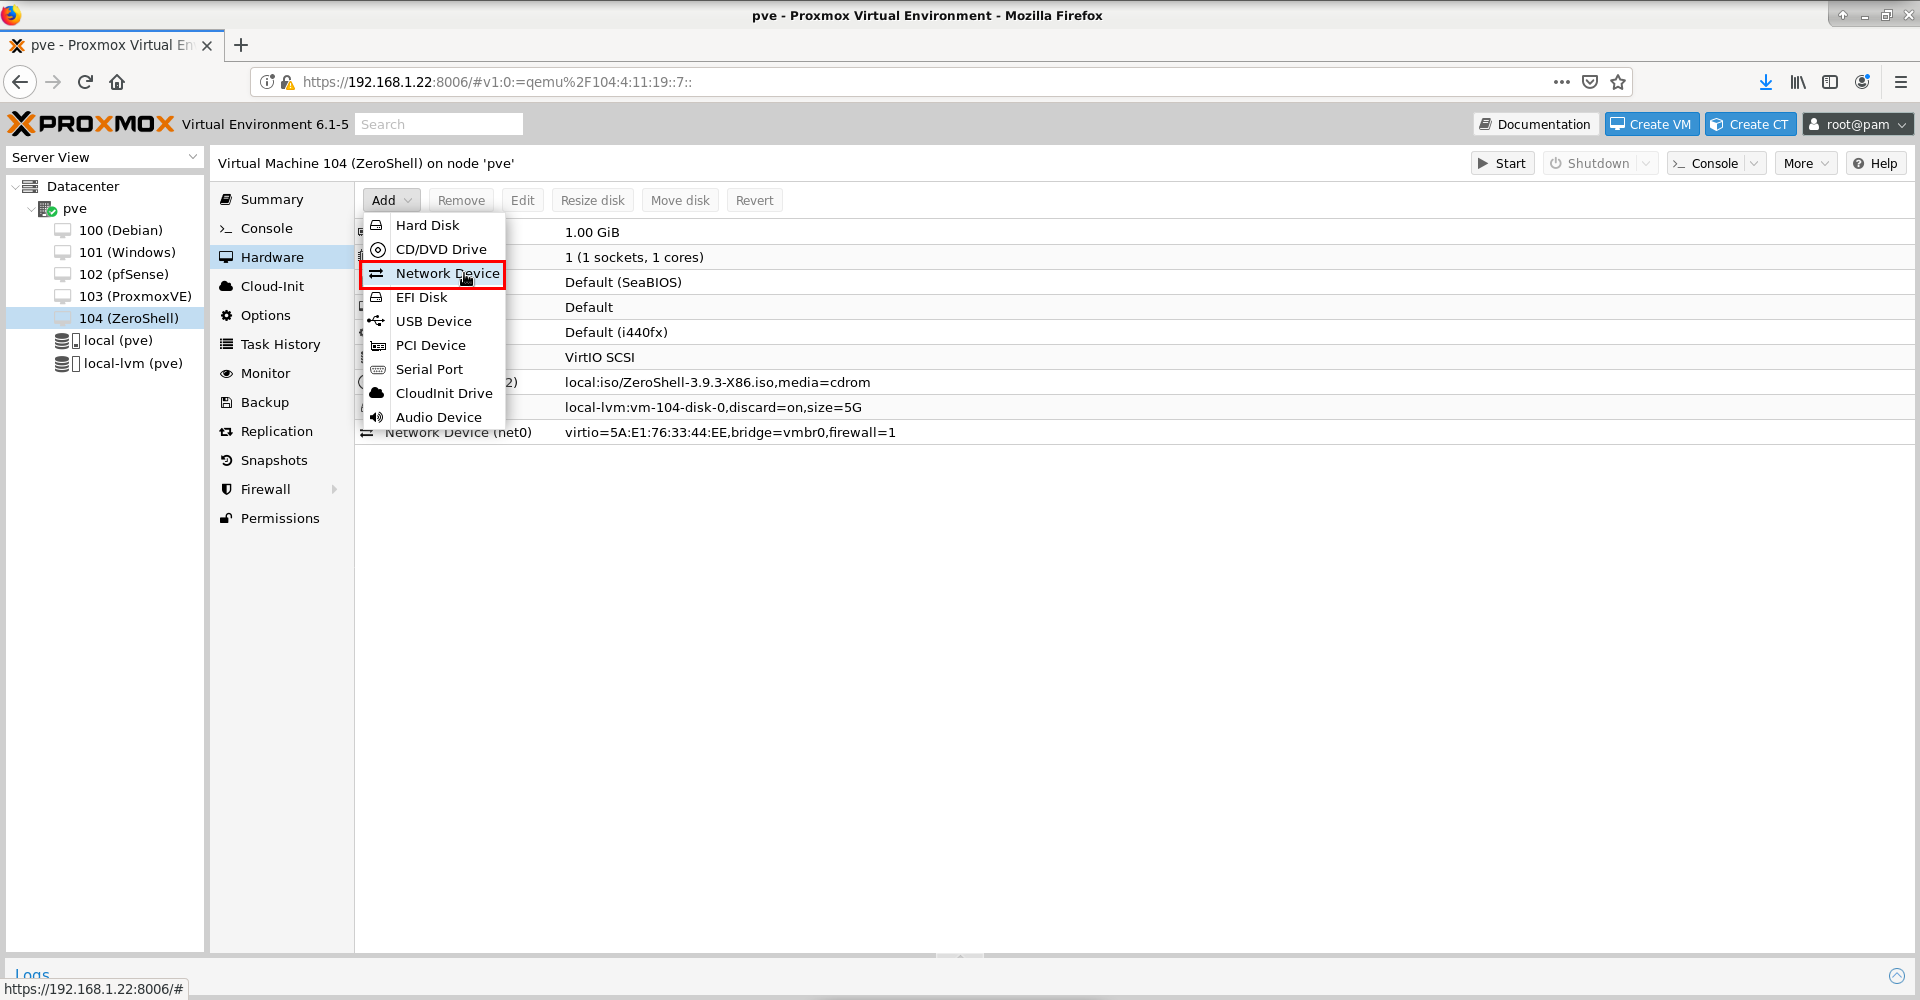
After that, we will choose the bridge created for this purpose, vmbr1, as shown in the screenshot below:  .png)
We can modify the model of the virtual board, but I kept it as Model: VirtIO (paravirtualized), as can be seen in the following image:
.png)
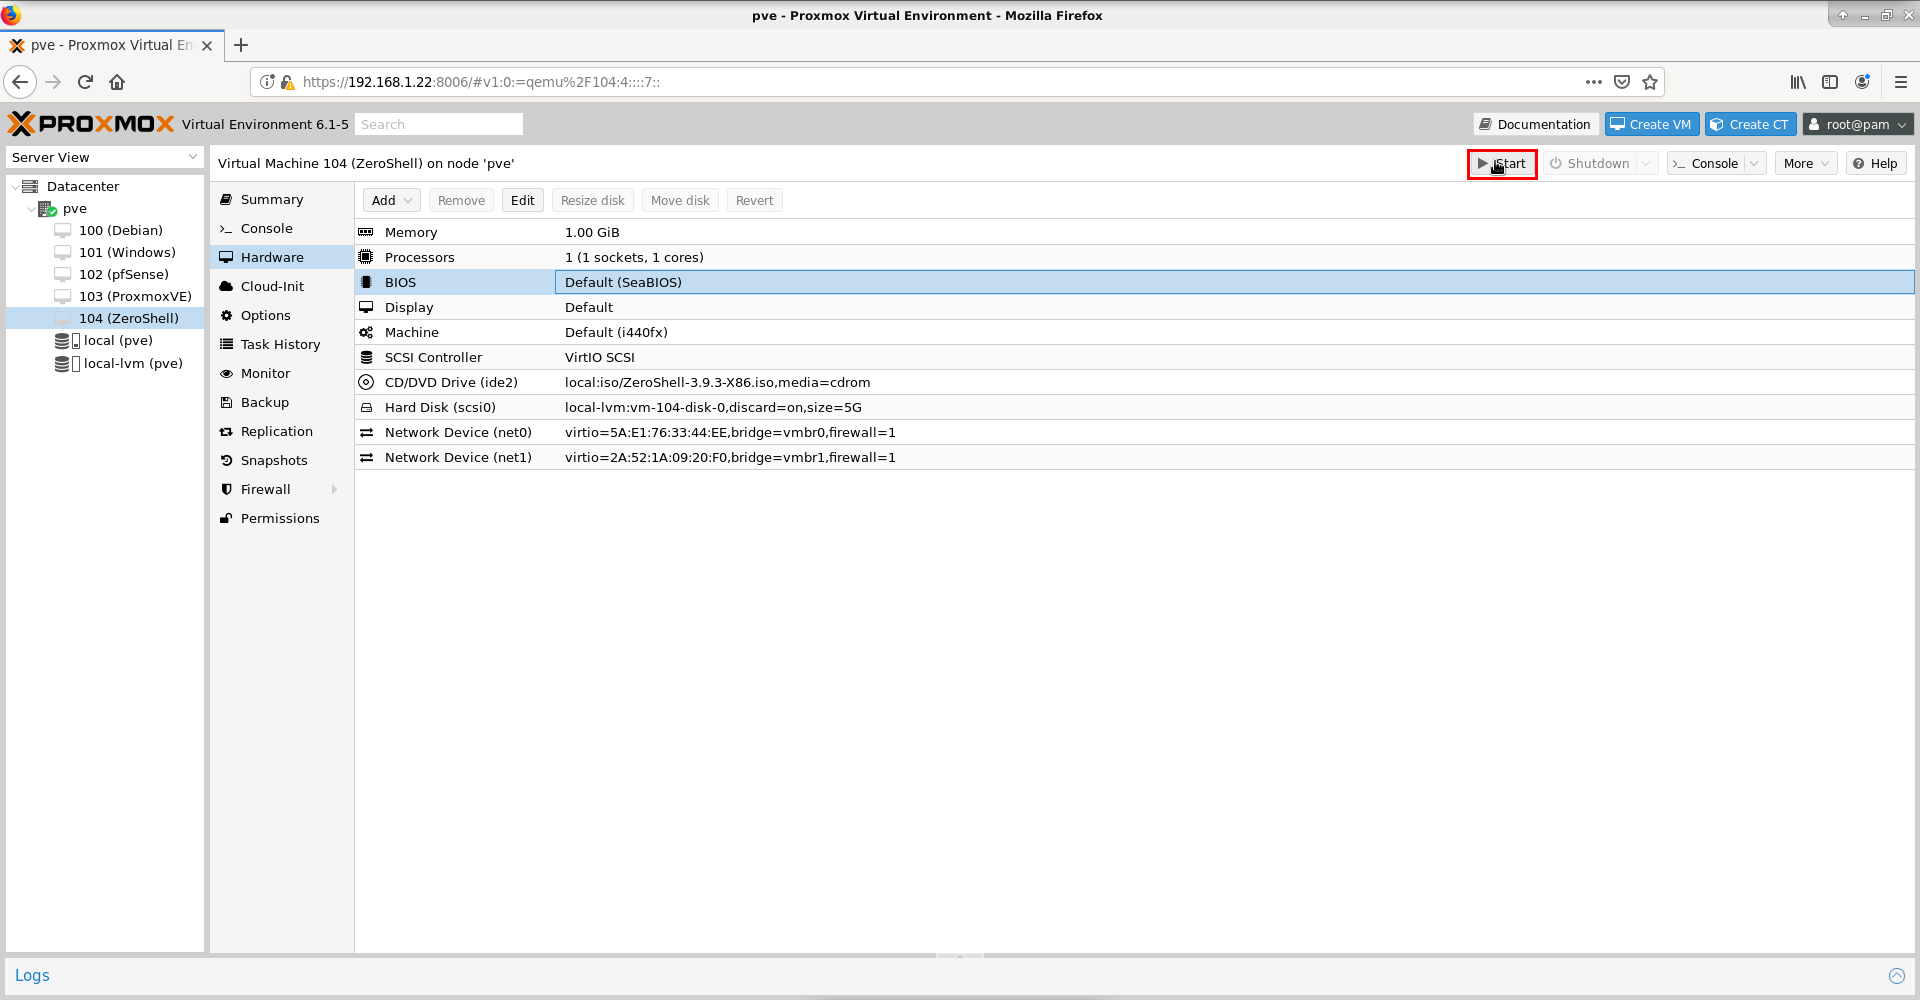
From a hardware options perspective, our virtual machine that will function as a router/firewall will look like the one below:
.png)
Now we are ready to start the virtual machine. This is done by pressing the Start button, as shown in the image below:
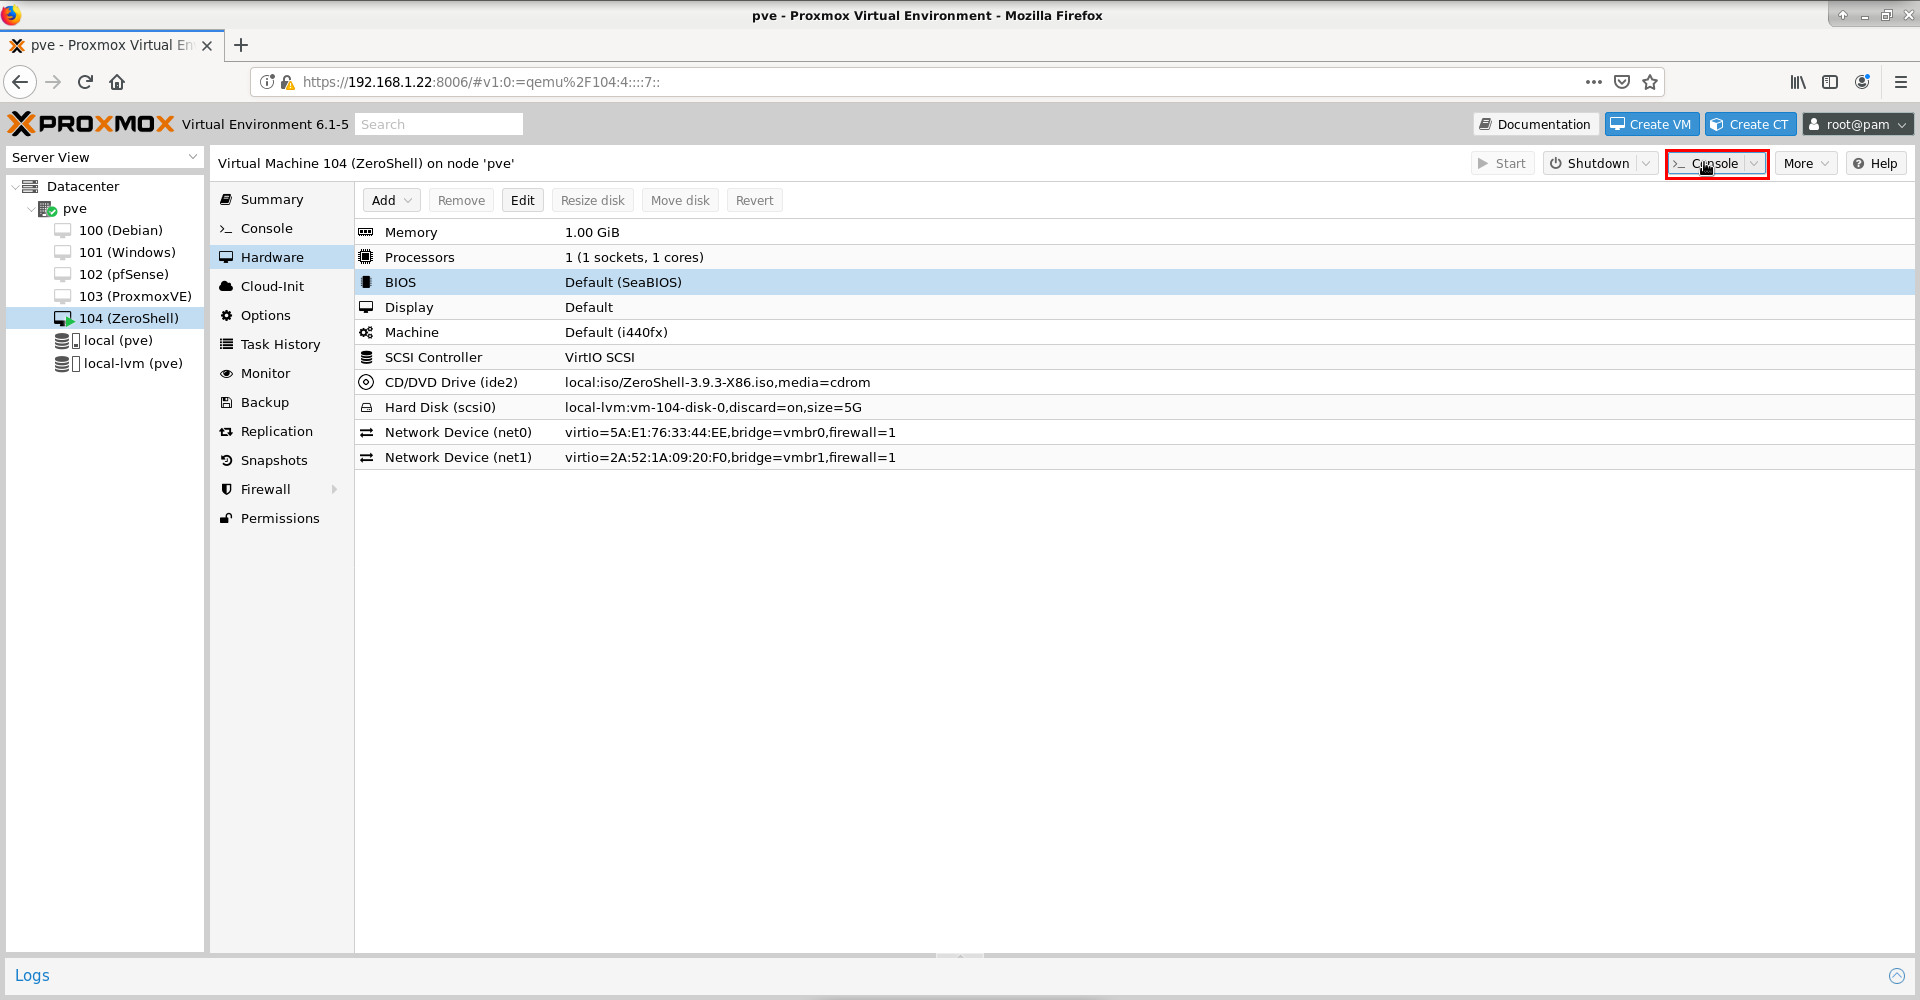
After starting the virtual machine, we will connect to the virtual machine's screen using the console by pressing the Console button, as shown in the image below:
After startup, our screen will look like the one below, and we will be ready to install the ZeroShell distribution in our virtual machine. In this sense, we choose option A by obviously pressing the A key:
_-_noVNC.png)
Then we will choose the disk used for installation; in this case, we select option 1:
_-_noVNC(1).png)
We will be asked if we are sure of our choice since any information on the disk will be destroyed; we agree by typing the word yes, as shown in the image below:
_-_noVNC(3).png)
In the next screen, we will be asked what type of console we want for interaction with the ZeroShell server, either a video console VGA or a serial console SERIAL; in this case, we will choose VGA:
_-_noVNC(4).png)
In the next screen, we will be asked if we want to add kernel parameters at machine startup; in this case, we chose the default value quiet:
_-_noVNC(5).png)
In the following, we will need to define a name for the current profile. I named it Main Profile as shown in the image below:
_-_noVNC(7).png)
Next, we will define the machine name:
_-_noVNC(9).png)
We will need to choose the system administrator (root) password:
_-_noVNC(11).png)
I left the default addresses for the LDAP server:
_-_noVNC(12).png)
and for the Kerberos 5 server, planning to configure it when I need it, since I do not use them for routing/firewall:
_-_noVNC(13).png)
In the next step, we will be prompted to manage one of the network interfaces; I chose the ETH00 interface:
_-_noVNC(14).png)
Since in this step I encountered errors in changing the default IP 192.168.0.75, I left this address and will change it after installation upon reboot:
_-_noVNC(15).png)
After restarting the virtual machine, we will be greeted by a screen like the one below, and to change the IP address, we will select option I:
_-_noVNC.png)
Then we choose option M and the network interface for which we want to change the IP, in this case ETH00.
The screenshots are taken after I made the changes, so please repeat the steps for yourselves.
_-_noVNC(2).png)
We indicate which IP we want to change; we will select the desired one, in this case changing the default IP 192.168.0.75 to the desired address, which for me is 192.168.1.133.
_-_noVNC(4).png)
As I mentioned earlier, I made the changes beforehand, so I have to repeat myself.
_-_noVNC(5).png)
We indicate the Gateway address (the exit point):
_-_noVNC(6).png)
From now on, we can log in with the browser to make the remaining changes. The address in my case is http://192.168.1.133:
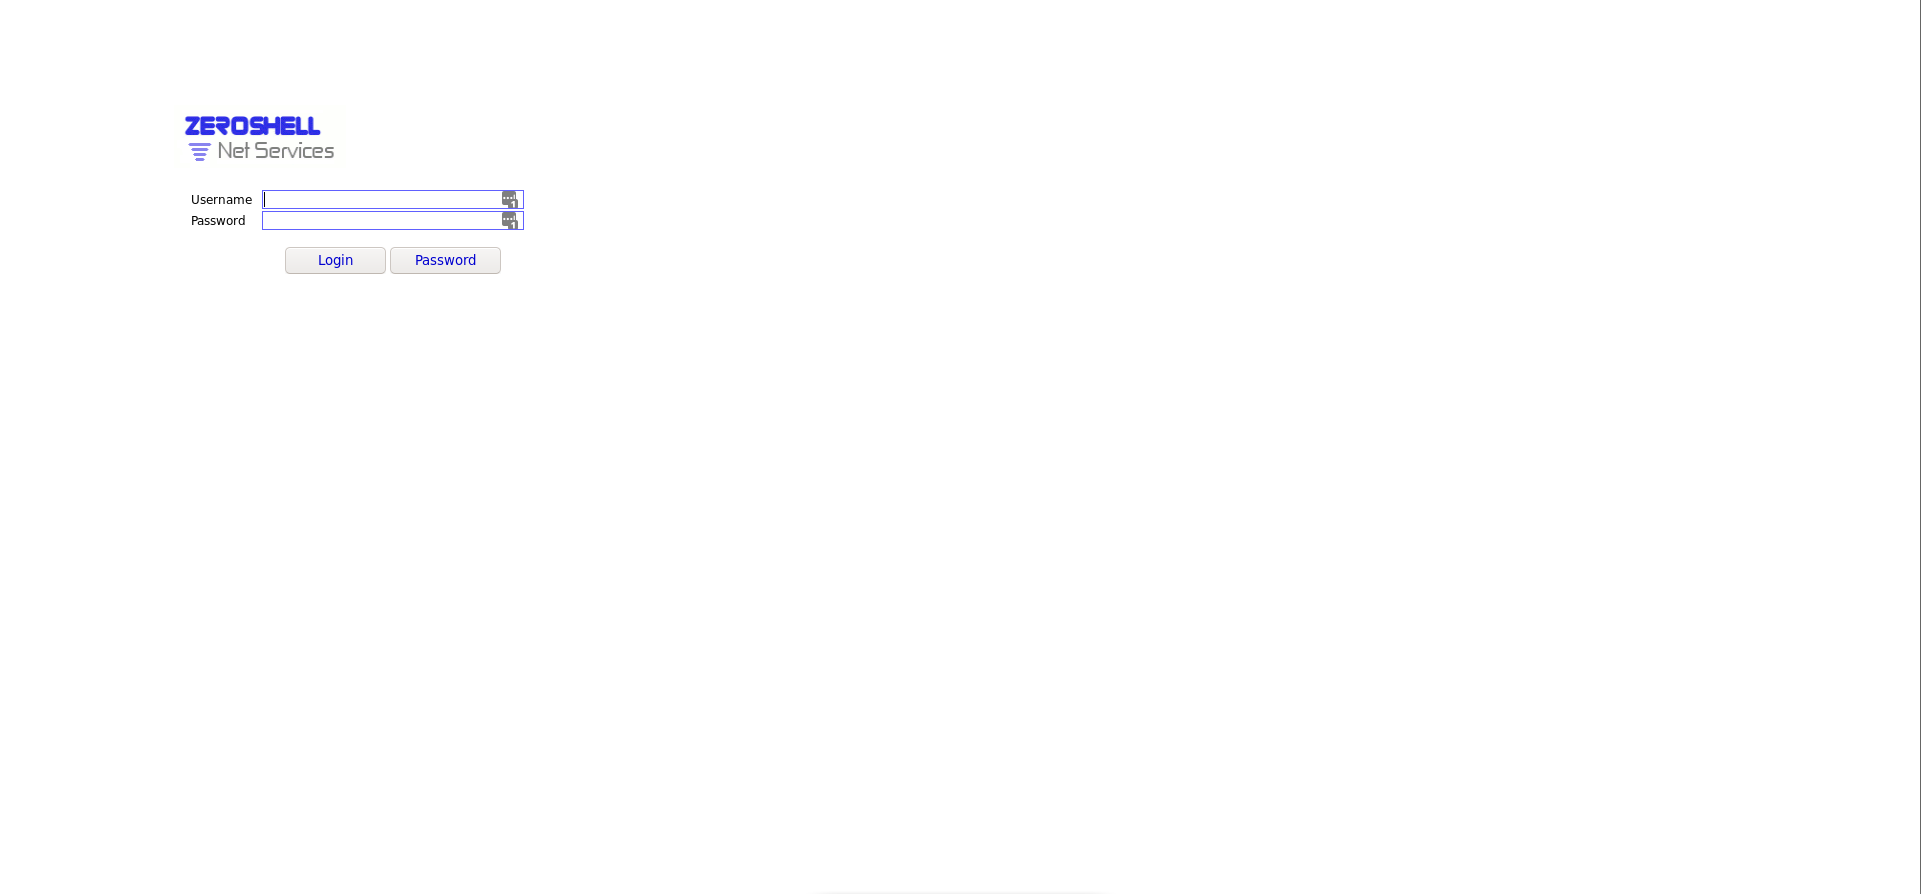
After entering the user admin and the previously set password ParolaAdmin, we will be greeted by the main page for managing the ZeroShell environment:
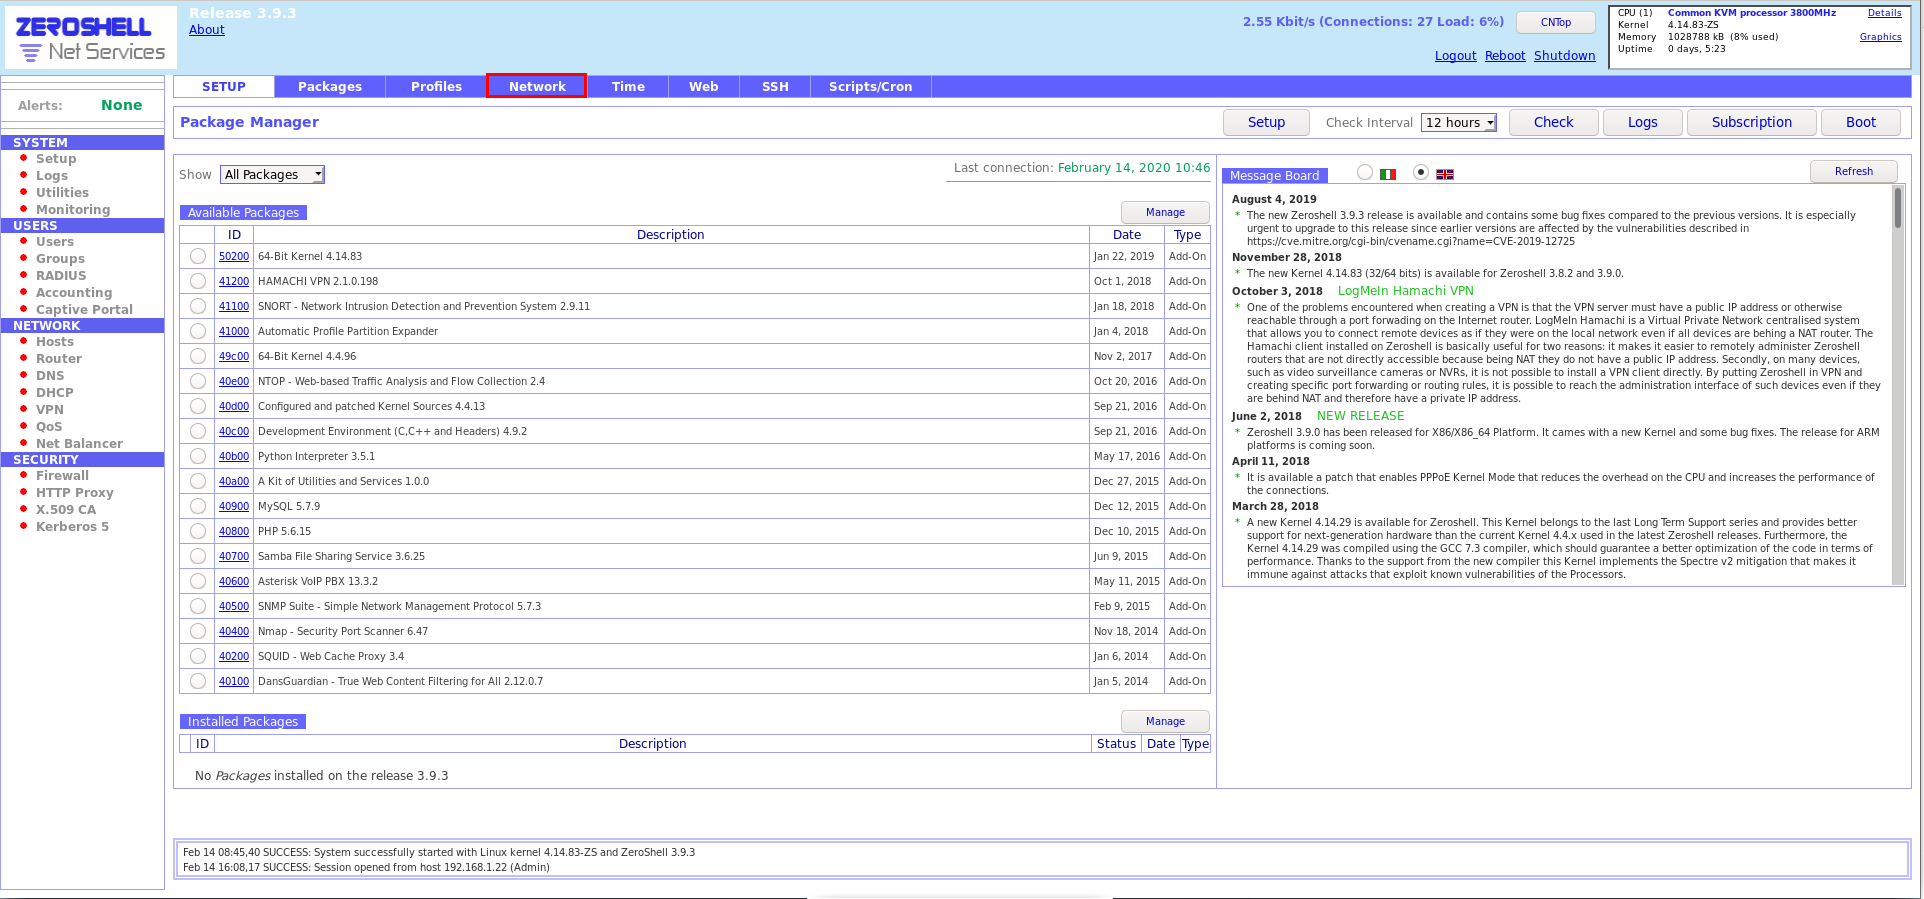
From the System -> Setup menu, we will choose Network, after which the page will open where we will have access to the configurations of the network cards, as shown in the image below:
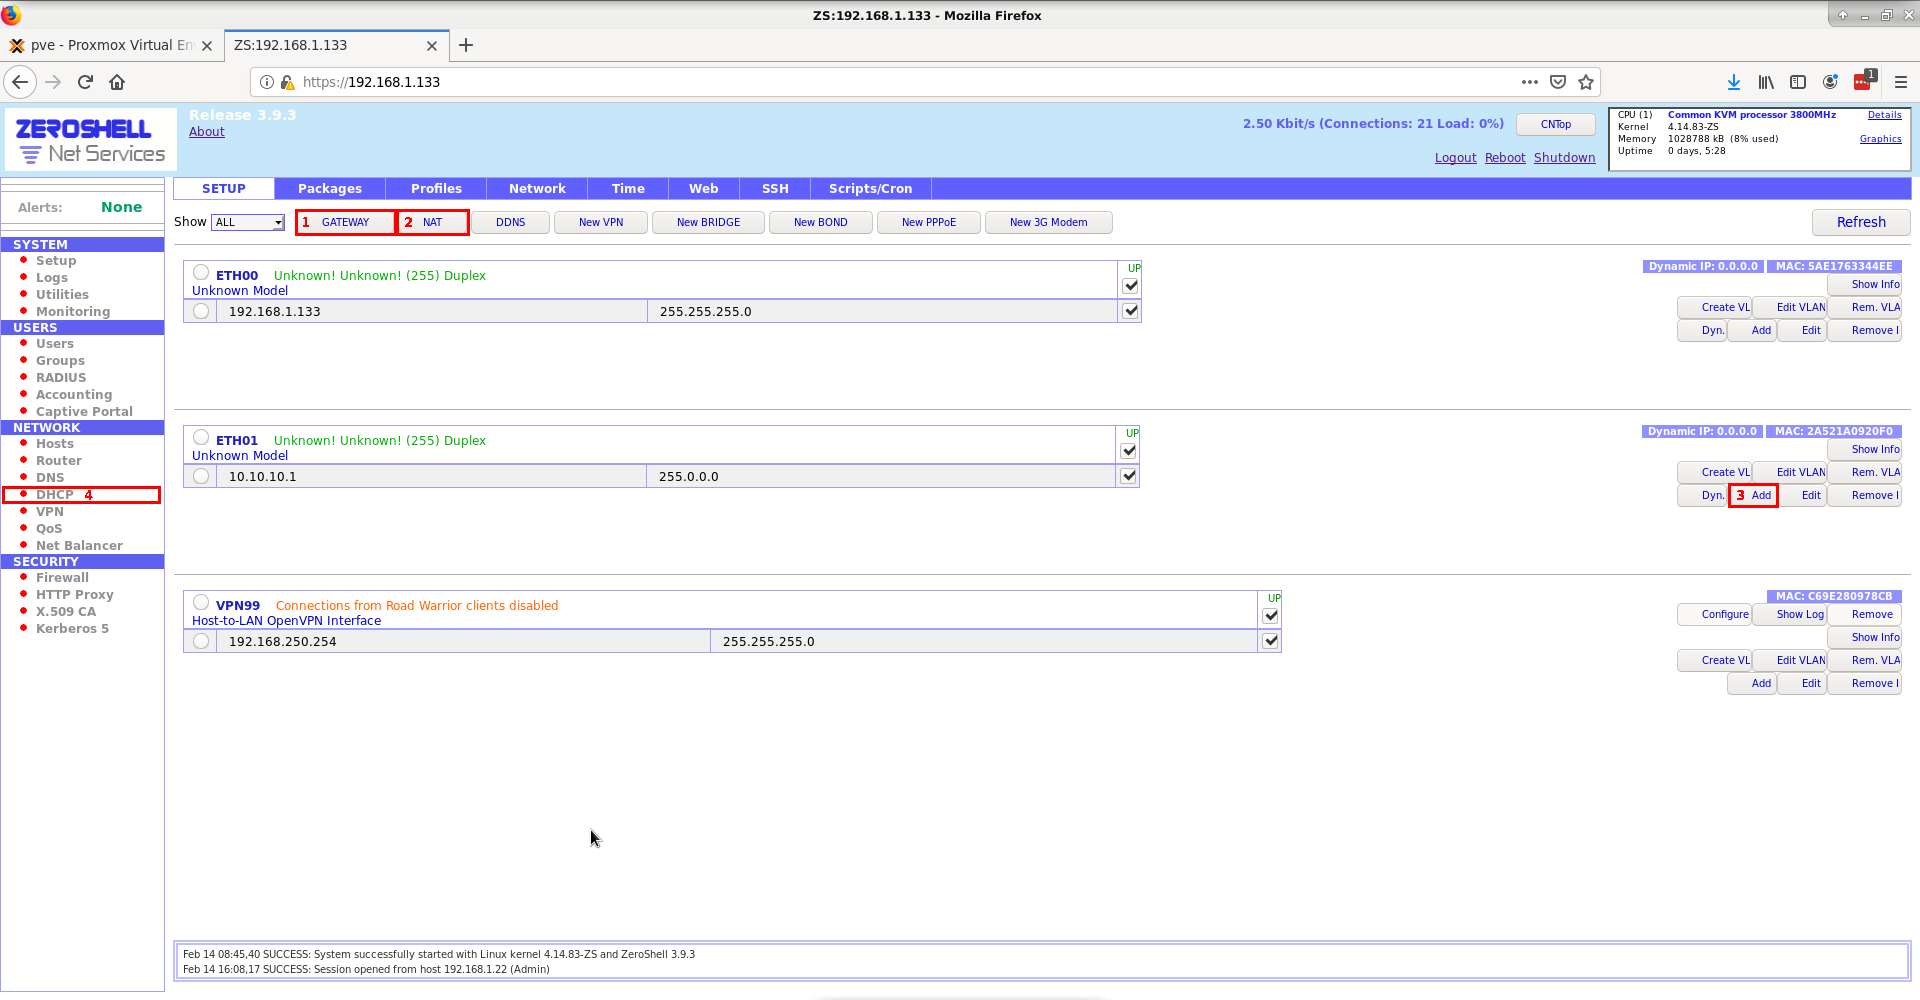
From here we can set/modify/check:
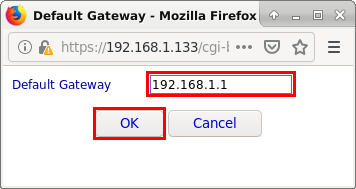
1 - the exit gateway GATEWAY:
2 - establish the translation of internal IPs to the outside - NAT

3 - setting the IP of the LAN interface. We have established that the LAN network will be from the A address class, with the address being 10.10.10.1 and the subnet mask 255.0.0.0 (I admit I may have gone a bit overboard, but I see no impediment at this moment):

After that, we will assign the DHCP server, the interface, and the corresponding addresses. For this, we choose 4 from the NETWORK -> DHCP menu. In the newly opened window, we will configure this server, and in the end, it will look like the image below:
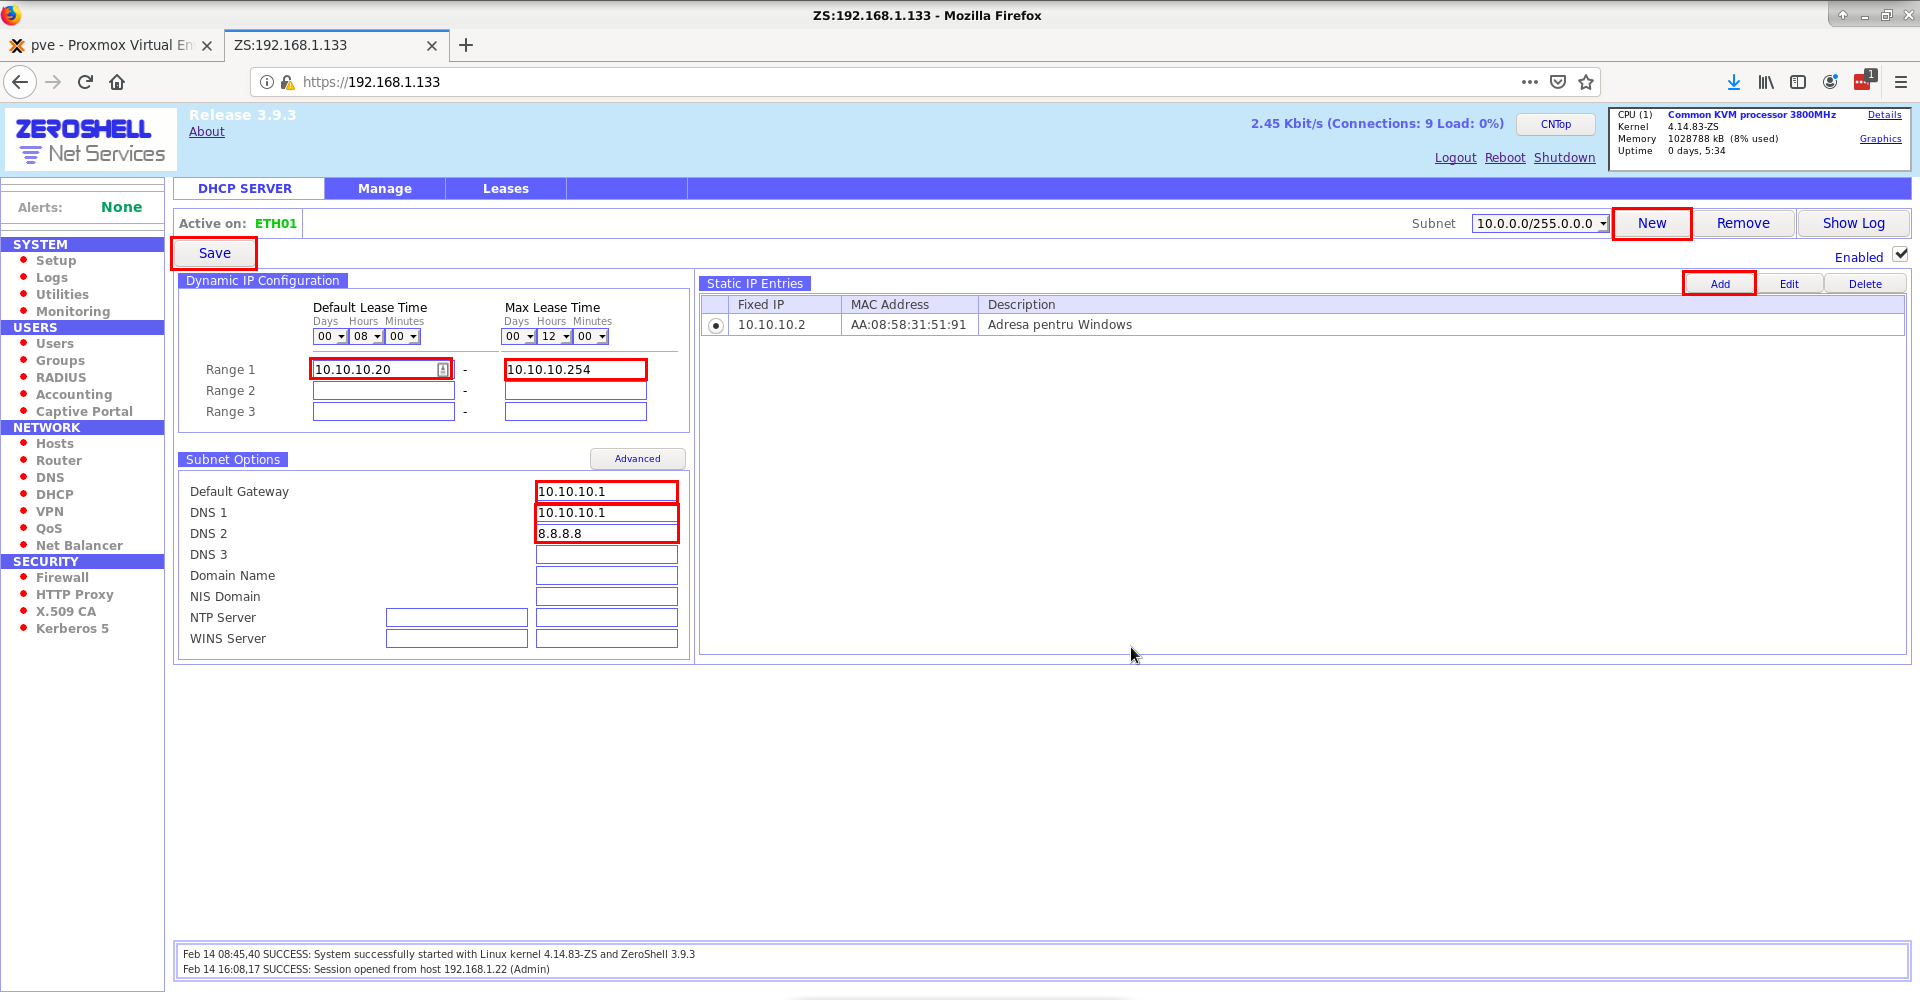
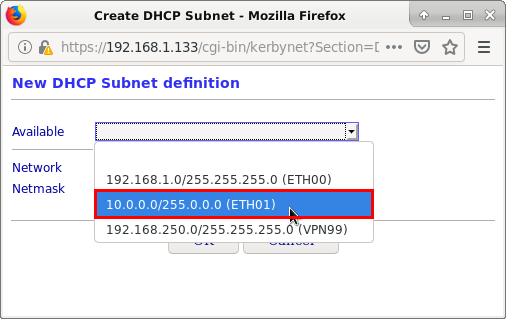
To start, we press the New button, and then we will choose the subnet that the DHCP server will manage:
in the end, it will look like this:

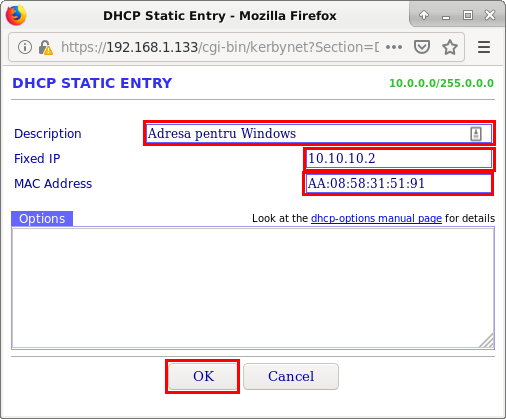
In the Static IP Entries window, we can set static addresses for certain terminals based on their MAC address, as shown in the image below:
In the Dynamic IP Configuration window, we can set the addresses dynamically allocated by the DHCP server. In this case, we have set the dynamic addresses to be between 10.10.10.20 - 10.10.10.254, as we have reserved the addresses from 10.10.10.2 to 10.10.10.19 for static allocation.
In the Subnet Options window, we have set the addresses for DNS and the gateway for the addresses allocated by DHCP.
Now we have the minimum necessary for our network to be functional. We are about to install the Linux and Windows operating systems on the two virtual machines that will be connected to the LAN in our virtual network.